Happy Birthday!

Happy birthday...
happy birthday...
happy birthday to me!!!
Yep! it´s my birthday today, and NOPE I´m not telling how old I´m now!
It´s very easy for me to think of presents for everybody but I had always a hard time to find something for me, so I made myself this envelope where I put some money as a self-gift and I told to myself to spend it without regrets!
This cute image is Ratiny in a cupcake from Softpencil, Elizabeth has such beautiful images at her shop, you should go and see for yourself, they are completely cute! I started by decorating the envelope using some old patterned papers from my stash that I faux stitched around them with fine markers. Took a brown ribbon and I tied it with a bow, a scrap of the same ribbon and a button are the decoration of the closing.
I printed the image twice, I colored one of them with colored pencils, from the other I cut the frosting of the cupcake that I glittered with my new white crystal glitter (I´m loving this stuff!!!) and placed it with foam tape for dimension on the colored one, do you see the frosty effect? it´s so beautiful in real life! I wish I could take better pictures... Here is another angle picture so you can see Ratiny hidding behind
I decorated the cupcake with a flower and a button (from my stash also) and some heart stickers. I placed the image with foam tape on the envelope, hand wrote the sentiment with fine markers and voilá! very easy and finished in no time.

I´m playing with this envelope at the following challenges:
Lollipop Crafts Challenge #9: glitter, sparkle, gems
Aly´s Sunday Challenge #26: recipe (2 design paper + 2 buttons)
Little Red Wagon Challenge #47: glitter
Cupcake Crafts Chalennge #10: pink and brown
One stitch at a time Challenge#32: anything goes... as you like it!
Stamp, Scraps and Doodle: stitching
Sentimental Sundays Challenge #22: let´s see some dimension

glittery day

At first glance this card doesn´t look like it has much glitter, true, the one I used this time is so thin that sticks everywhere like if I´d used tons of it... but I love it, it sparkles and shines a lot!
The image is Flower girl from Glitterbabe, I colored it with colored pencils in shades of soft pink and a bit of green. I added white crystal glitter that I found in a craft store a few days ago and I really had to have it.
I used some digital papers from Summer Driggs, the sentiment is from Jaime (I love it! and I used it before here) that I mat it with a scrap of black paper. I pierced around the central circle, stitched black glass seed beads with embroidery floss and glued some pink seed beads on the centers of some flowers on the paper. I embellished the card with a heart, a flower and three punch butterflies, all of them I decorated with white crystal glitter and that thin pink glitter I told you about. I placed the embellishments and the image with foam tape on the card and I glued the butterflies here and there...
I´m very pleased how this card turned out, hope you like it too!

I´m playing with this one at the following places:
Glitterbabe´s Challenge #13: sketch
Creative inspirations Challenge #43: pink and black
Digital Tuesdays Challenge #77: it´s all about the girls
Flutter by Wednesdays #123: all winged things!
Stamp, scrap and doodle: stitching
One Stitch at a Time #32: anything goes... as you like it!
Lollipop Crafts Challenge #9: glitter, sparkle, gems

Mermaid song...

Michelle Perkett Studio Challenge blog this week is challenging us to use a tag on our projects, and they gave me the excuse to make this tag/bookmark using this gorgeous image: Eva the glam mermaid by Michelle Perkett.
I colored the image with colored pencils blended with gamsol and added dots of crystal glitter on some of the pearls of her "dress". I placed the image on the tag with foam tape for dimension.
The paper I used is from a very talented lady Julia van der Werf, I cut it in half and glued each one on each side of the tag, so I have the same paper on the back where I left a place to write a personalized sentiment. I added  a ruffled lace ribbon, made a hole on the top, tied a piece of sheer ribbon with a big pink bead (all from my stash) through it and finished the tag with crystal glitter glue.
A very easy, quick and simple one! hope you like it!!
I´m playing with this tag at:
Michelle Perkett Studio Challenge #46: tag you´re it!
Creative Inspirations Challenge #43: pink and black
Totally Paper Crafts Challenge #35: a kind of magic
Little Red Wagon Challenge #47: glitter
Allsorts Challenge #71: plain and simple

All Pets Go To Heaven...

When I saw Pet Angels at 2 Cute Rubber Stamps I knew I had to make a card with it. My daughter loves pets and she lost her hamster Lisa a time ago (she lived to a very old little cutie), this card was made for her.
Aren´t these three super cute??? I colored them with colored pencils, I made the cloud with dots of puff white fabric paint (rubbed some body shimmer dust after puffed) and their halos with gold metallic paint.
The patterned paper I used this time is an oldie from my stash, I love its subtle colors! and the design is very appropriate for a sympathy card, I don´t know why I didn´t used it before... I Cut the image in a circular shape and placed it on the patterned paper. I was thinking to stitch around it but instead I decided to make a frame with punched hearts. I hand wrote the sentiment with a fine marker on embossed vellum paper, then I cut the words separately with edge scissors and distressed the borders with chalks. I placed the sentiment around the frame and finished the card painting dots of gold metallic paint in between the words and around the card.

I´m playing at Pollycrafts Challenge #62: cute and cuddly, Paper Play Challenge #38: cofee and cream,

Bookmarks

I was in need to start using my scraps, so I made bookmarks to put them to good use
In these two I´m using My tiny friends from Softpencil, I colored them with colored pencils blended with mineral oil. I cut the images and place them on the bookmarks with foam tape.
On this one I used Bath from Whoopsi Daisy that I colored with colored pencils (no blending here), cut and placed it on the bookmark with foam tape.
And on the forth I used Emmy from Baby Bud Designs, colored with colored pencils blended with mineral oil. I cut the image and placed it with foam tape.
I finished them all with ribbons, buttons (from my stash) and dots of pearled paint here and there. They turned out great, they look better in real life though...

Sew fabulous!

This is my first work as 2 Cute Rubber Stamps DT! I´m so glad to be part of this group of talented ladies I´m having lots of fun creating with these cute images.
I made two cards with two different colors. The original idea was the green one but when I was going through my stash of papers I saw a piece of this beautiful pink gift wrap paper I bought a time ago and I had to make a pink version too. The layout I used here is from Clean & Simple sketch #89 that I wanted to give it a try someday.
I used Cat-Knit from Heidi Schwoerer (you can find her store here), I printed two kitties, colored them with crayons and oil pastels and blended them with mineral oil. To make the yarn I used white puff fabric paint that I puffed with iron steam when it was completely dry, after that I gave them color with chalks and glued a thread of embroidery floss (green and pink). I cut the images and placed them on the cards with foam tape.
I computed generated a label with a PS brush and added the sentiment, from TLC creations, and printed them directly on craft paper. I embellished the cards with flowers I made with scraps of ribbon, paper, felt, old buttons and a brad. On the pink card I stitched the label with yellow embroidery floss and added some transparent glass seed beads before placing it to the card.
I like them so much that I took front pictures too! (click on them to enlarge)
My post are scheduled weekly on Fridays, but please stop by the 2 Cute Rubber Stamps Design Team blog for daily inspiration, challenges and tons of fun!

Dream in pink

Did you see how trendy is to use fabric on your crafts? I wanted to give it a try too and I glued shinny pink fabric (a scrap from a Halloween costume I made for my daughter a few years ago) to a piece of paper, once it was dry I used it like patterned paper. The fabric is great! looks like a hologram, changes colors, it´s so beautiful to the eye, so bad I can not put that onto a picture to show you...
I used Dream dragonfly from Michelle Perkett , I colored the image with colored pencils and added a rhinestone on the dragonfly´s head. Cut around the image and placed it on the card with foam tape.
A piece of lace, stitched pink glass seed beads and a scrap of pink paper finish the card. A simple card, I love how the colors go together and how the fabric shines!

I´m joining Michelle Perkett Studio challenge #44: stitch it up, Sundays with Crissy #9: sparkle and shine and Aly´s Sunday challenge #25: sparkle and glitter.

DT assignment!

Did you notice my new button on your left side?!
Yes!! I´ve been selected to be part of the DT members of 2 Cute Rubber Stamps!!! I´m so happy they chose me, I feel very honoured to be part of that group of talented ladies and grateful for the opportunity, AND I can´t wait to get started!
Every DT member has a day assigned to inspire you, my posts are due on Fridays, you don´t want to miss them!!! it´s going to be great! my head is a roll right now with so many ideas, please go and check the Challenge Blog and while you are there you can join us in the fun!
If you didn´t see Heidi´s CUTE stamps yet, please do it! you´ll love them! she not only make digis, she has rubber stamps too! So, why don´t you go and take a look at her beautiful blog?
Here is a sneak peek of the image I´ll be using on my first post
did you guess it right? My first post will be September the 17th, but remember there is here an inspiration idea you don´t want to miss every day!

Show you care...

Be Aware!
That´s what I wrote on the inside of this card.
It´s my first breast cancer awareness card, but it won´t be the last because I´m making a few more. And while looking for a sentiment to add to my card before starting it I searched for "breast cancer quotes", and I come across some very bad comments about the campaigns of awareness, the pink color, the humorous quotes (they said) are not taking seriously the illness, and it left me thinking about it... Cancer is bad enough to take it slightly, true, but it´s bad enough as not to try to make the best of it. Life is short and most of the times it´s not a bed of roses, but through my personal experience I learnt to make the best of every situation, lift up my face to the sun and keep forward, so to be truthful to those brave woman who face cancer, I made my card pink because I care!
Here is a closer picture of the image, I´m using Support, a freebie Stef (from Glitterbabe) so generously gave. I colored the image with colored pencils and glittered the filigree with silver glitter. I used a scrap of cardstock (from my stash), a scrap of patterned paper (from Jaime), and a gorgeous paper I bought a few days ago, it has a wonderful texture and a bit of transparency.
I tied a ribbon on the front, embellished it with a rose (I made another one before here) and hand wrote the sentiment with a gray marker.
I hope you like it!
I´m playing with this card at:
Glitterbabe´s Challenge #10: free up a freebie
Sundays with Crissy challenge #9: sparkle and shine
Creative Inspirations challenge #42: anything except square or rectangle

Summer Fun!

I was in need of some bright colors to lift my spirits, and this card is definitely bright for my standards. It did me well because now taking a look at it reminds me how much fun we had this summer at the beach... and it makes me smile :-)
the gorgeous little cute girls is Olivia a freebie Michelle Perkett so generously gave at her groups on PCP and CDAC (if you are not a member yet, join us!! you don´t want to miss the fun!). I colored Olivia with colored pencils (she got a tan!), cut around and added a few dots of glitter paint on the sand before placing her with foam tape on the card.
The patterned paper is a very (very) old paper from my stash. To embellish the card I made a flower layering two of them with a smiley button as its center, I painted with glitter paint three sea shells my DD and I took from the beach and to finish I added 3 punched butterflies and dots of glitter around the patterned paper.
I´m joining the following challenges:

Michelle Perkett Studio Challenge #43: hang on to summer fun!
Flutter by Wednesday Challenge #120: sketch
Glitterbabe´s Challenge #10: free up a freebie
One Stitch at a time challenge #29: Blooms, butterflies, bling

Cupcakes!!

These gorgeous cupcakes are from 2 Cute Rubber Stamps, a freebie Heidi so generously gave to participate at her challenge blog.
I used as inspiration the colors and positioning of the cutties the Cupcake inspiration challenge #74 (sadly I didn´t make it on time...). I tried also to keep it simple and only used a white gel pen to faux stitch the squares and write the sentiment
I colored the images with colored pencils, added glitter glue on the frosting for some sparkling effect, and I placed them with foam tape on the card.


I printed five cupcakes just in case and I had one left, so I decided to use it to make a small card (those you can put along with your present in a paper bag) with scraps of paper I had around.
I colored the image again with colored pencils but this time I blended them with mineral oil. And instead of glittering the frosting I glittered the paper, I added a couple of brads too. The sentiment is from TLC creations.

I´m playing at:
2 Cute Rubber Stamps: challenge and freebie
Cupcake craft Challenges #106: let´s get digital
Party time Tuesdays #14: brads
The Creative Cottage challenge #22: celebrations
Glitterbabe´s challenge #10: free up a freebie
Paper Play challenge #35: in stitches

{back to school} mood...

it´s a great feeling to be inspired, lots of ideas popping into my brain... but why do I have to wait until the last day???!!! well... that´s me!
I made another pencil holder with these adorable cups (first pencil holder here). This time I used 
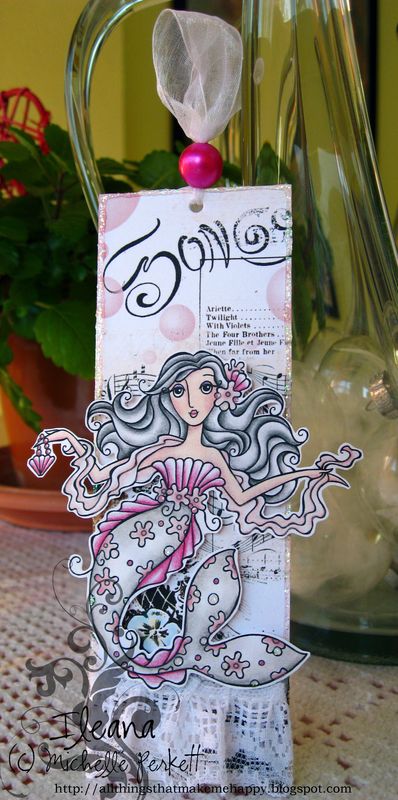
Mary Margaret, teacher´s pet from Michelle Perkett (her Etsy shop here!)
this is my first paper piecing work and I LOVED the technique! I don´t know why I didn´t use it before... I printed the image twice: one on white paper and another on a digitalized dictionary text made by Mel (if you can visit her awesome blog, you won´t regret it!). I took the white image and colored it with colored pencils leaving out the dress. I cut around her arms to make room so I could slip under the dress. Then I colored MM´s dress with colored pencils, cut it and glued it to the base image, and I slipped a piece of cardstock under her dress and the apple to give a little bit of dimension.
To decorate the cup I started with a strip of craft paper and distressed it with chalks. I made two borders to layer the craft paper: the first one I cut it with a hand drawn scalloped shape and the second one with edge scissors, and distressed them both before attaching them to the craft paper. The apples: I started with a scrap of polka dot paper and printed on the wrong side apples, cut them around and distressed them also. Took some green felt and cut three circles that I decorated their borders with decorative stitches, my first try! that´s why they are not even at all... I found how in a very old fabric dolls book that belonged to my grandma. And I finished the apples with buttons my MIL saved for me with a couple of stitches to hold everything together before gluing them to the pencil holder.

The pencils on the first picture seemed to plain, so I made tags for them. My first inchies!! (I´m full of firsts today!) I cut four 1.5 in diameter circles of craft cardstock and decorating them with scraps of everything.
Side 1
Side 2
Part of the images are from Shirley´s 2 girls and I colored them also with colored pencils. I distressed the edges with chalks, added some stickers (hearts and stars), used edge scissors, doodled with white gel pen, used scraps of felt, made a hole with a paper punch and tied them to the pencils with raffia.
Hope you like my project and maybe inspired you to make a set like this one too!

I´m joining:
Cupcake Craft Challenge #106: let´g get digital
Digital Tuesday Challenge #74: make a gift set
One Stitch at a Time Challenge # 28: girly
Bee Crafty Challenge #37: anything goes